Your Cart is Empty

Preciosa Beads Woven Necklace Jewellery Making Project

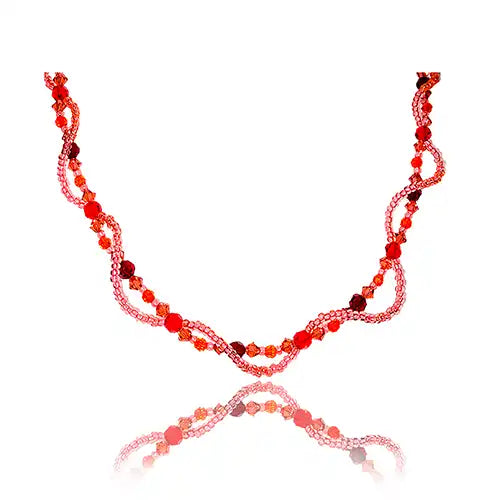
Follow the steps in this jewellery making tutorial to craft your very own handmade woven beaded necklace with Preciosa Beads. This bold warm blend of colours is perfect for the upcoming summer season. The quantities listed below will create a collarbone style necklace that sits below the neck; however you can increase the quantities to create a necklace length that suits your preferences.
Component List:
The full list of Preciosa beads, components and tools needed to complete this project can be found below. If you click on the product description (link), the respective product page will open, where each item can be viewed and added to cart:
| Component Image | Component Name / Link To Purchase | Component Quantity |
 |
Preciosa Bicone Beads 5mm Padparadscha | x 50 |
 |
Preciosa Round Beads 4mm Hyacinth | x 25 |
 |
Preciosa Round Beads 6mm Siam | x 10 |
 |
Preciosa Round Beads 6mm Light Siam | x 10 |
 |
Preciosa Seed Beads 8/0 Light Red | x 10g |
 |
Bolt Ring Clasp 6mm Silver Plated | x 1 |
 |
Oval Jump Ring 6mm Silver Plated | x 1 |
 |
Crimp Beads 2.5mm Silver Plated | x 2 |
 |
Crimp Covers Silver Plated | x 2 |
 |
Monofilament Illusion Cord Clear | x 1 |
 |
Thread Cutters | x 1 |
 |
Round Nose Pliers | x 1 |
 |
Chain Nose Pliers | x 1 |
 |
Crimping Pliers | x 1 |
Instructions
Step 1
Group the beads into sets of two
The necklace is formed of 2 ‘groups’ alternating each time. Begin by grouping the beads together so that you can thread one group at a time. Prepare your beads in this order.
- Group 1: Padparadscha, Light Red Seed Bead, Hyacinth, Light Red Seed Bead, Padparadscha, Light Siam
- Group 2: Padparadscha, Light Red Seed Bead, Hyacinth, Light Red Seed Bead, Padparadscha, Siam
Step 2
Thread your groups
Take your Clear Illusion Chord and cut to 40cm. Start threading your group1, followed by group 2 and then group 1 again. Keep alternating until you have threaded enough as to have 5cm of illusion cord leftover at each end.
STEP 3
Threading your woven look beads
Once all beads are successfully stranded, cut another cord measuring 50cm. Thread this cord through the first 6mm Light Siam Round Bead, leaving 5cm spare to be grouped together with the initial cord you had left over. Start by threading 10 Light Red Seed Beads (Rocaille Beads) and thread the cord through the next 6mm Siam Round Bead and thread another 10 beads. Twist this next strand to be on the opposing side to the strand you had just threaded. Thread through the next 6mm Light Siam Round Bead, thread another 10 beads and thread through the following 6mm Siam Round Bead, twisting it to opposing sides again. Repeat this process threading each time though the following 6mm Round Beads and twisting each strand to sit on opposing ends to the last strand. This should now start to look woven. Continue until you get to the last 6mm round bead.
STEP 4
Attaching the clasp and jump ring
Once you have woven your necklace, gather 2 crimp beads, 2 crimp covers, crimping pliers and your clasp and jump ring. Thread the left end of both strand through the same crimp bead, thread through the loop of you clasp and back through the crimp bead. Repeat on the right end of the strands too, instead of threading through a clasp, thread through a jump ring.
STEP 5
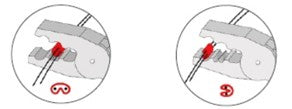
Securing your crimp beads
Using your crimping pliers, Crimp shut both beads in turn with the first set of grooves on the pliers, following by closing the bead shut with the second groove on the pliers like so.
Step 6
Attach the crimp covers
Cover your crimped beads with a crimp cover and secure it shut with a chain nose plier.
Step 7
Trim the strands
Thread the remaining end of the illusion cord through the beads and trim away any leftover strands.
Congratulations you have completed the project!
So why not add a touch of summer magic to your wardrobe with the summer shades woven beaded necklace? Whether you're looking to make a statement at a summer event or simply want to brighten up your everyday look, this stunning piece of jewellery is sure to turn heads and make you feel like a summer goddess. So go ahead, embrace the colours of summer and treat yourself to a piece of jewellery that's as beautiful as it is sustainable.